
Table of Contents: Garage Lights Installation Guide
- How to Install Outdoor Garage Lights
- Outdoor Garage Lights: Take the DIY Approach
- FAQs for Outdoor Garage Lights
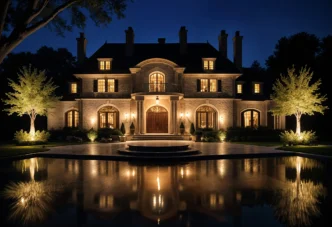
Benefits of Exterior Garage Lights
Outdoor garage lights can make a world of difference—improving visibility, safety, curb appeal, and giving you peace of mind when you arrive home at night. If you’re ready to tackle it yourself, here’s a straightforward, step-by-step way to get the job done.

How to Install Outdoor Garage Lights
Installing outdoor garage lights is easier than most DIYers think. With the right fixtures, tools, and a step-by-step plan, you can upgrade your setup in a single afternoon—no electrician required.
- Pick Your Lights
Start by selecting lights designed for exterior use, ideally fixtures rated for “damp” or “wet” conditions, especially if they’ll be exposed to rain, snow, or outdoor temperature swings.
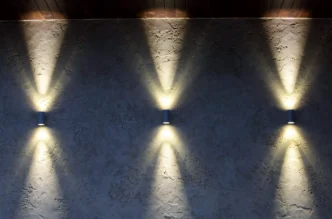
For a typical garage wall or above-door mount, exterior wall-lights, sconces, or flood lights are all good options.
Brightness matters too—many exterior garage lights sit in the 700 to 1,500 lumen range, but you can go brighter depending on how much light you want for driveway, path, or overall garage-door area coverage. - Choose Where to Mount the Lights
Before digging into wiring or drilling, decide exactly where you want the fixture(s) to go.
Whether it’s beside the garage entry door, on either side of a double garage door, or above the door—measure carefully, check for studs or a solid surface, and make sure the placement gives good light coverage without blocking the door or interfering with trim or siding.
If you’re replacing an existing light, the old mounting point might work. If it’s a new install, you may need to cut into the wall, install an outdoor junction box or mounting block, and make sure you meet local code. - Turn off the Power
Before doing any wiring, head to your main breaker panel and shut off the circuit that powers the garage. Use a voltage tester if you have one to double-check that power is off.
This step is critical to avoid electric shock. Always assume wires are live until you’ve confirmed they’re fully de-energized. Wearing insulated gloves and using tools rated for electrical work adds an extra layer of protection. - Prepare the Mounting Surface & Wiring Path
If you’re replacing an old fixture, remove it carefully (unscrew mounting screws, disconnect the wires, and remove the old junction box if needed).
If you’re installing a new fixture and there’s no existing junction box—cut a hole (or use a siding block, if you have siding) and install a properly rated outdoor electrical box or block. Make sure it’s flush or properly sealed so water can’t get inside.
From there, run the appropriate wiring (for example: 14/2 NM cable, or conduit depending on local code—especially if wiring surfaces are exposed). - Wire the Fixture
With the mounting box in place and wiring run, connect the fixture: black (hot) to black, white (neutral) to white, and green or bare (ground) to ground.
Use proper waterproof or damp-rated wire nuts, connectors, and sealants if specified by the fixture, especially for outdoor or damp-area fixtures. Attach the mounting bracket or plate that came with the fixture, then secure the fixture itself. - Install Bulbs
If you’re using a fixture that takes standard bulbs (or a drop-in), insert the bulb(s) now, observing max wattage and fixture instructions.
If it’s an integrated LED fixture, make sure wiring is complete and secure before testing.
Double-check that the bulbs are properly seated and that any covers or shades are securely attached before restoring power. - Restore Power & Test the Light
Once everything is secured, restore power at the breaker.
Switch on the light to test it. If it doesn’t come on—turn power off again and double-check your connections, grounding, and that wires are properly seated.
Adjust the fixture alignment or angle if needed to ensure optimal illumination of your garage and driveway. - Seal & Weatherproof (If Exposed)
Because exterior garage lights face the elements, it’s important to seal around the fixture base and junction box with exterior-grade silicone or caulk.
This will help prevent water intrusion, ice buildup, or corrosion—especially important if your house sees snow or freezing weather.
Proper weatherproofing also extends the life of your fixture and keeps your installation safe and reliable year-round.

Outdoor Garage Lights: Take the DIY Approach
A clean install—correct height, proper wiring, secure mount, weatherproofing—does more than just add light. It improves safety (less tripping or bumping in the dark), adds curb appeal (nice lighting makes a house look more finished), and can deter intruders by eliminating dark hiding spots near garage doors.
Plus, if you choose LED or modern fixtures, you get energy-efficient lighting that lasts: fewer bulb changes, less power drain, and often better visibility overall than older lights.
FAQs for Outdoor Garage Lights
Outdoor garage lights include wall sconces, lanterns, flood lights, security lights, and decorative coach or gooseneck styles—many available in long-lasting LEDs. Each type serves a specific purpose, from enhancing style to improving safety and coverage.
Pick fixtures rated for outdoor use, then match brightness, style, scale, and features like motion sensors or dusk-to-dawn controls to your lighting and security needs. Consider the surrounding space and how the light will interact with your driveway, doorways, and landscaping.
Outdoor garage lights boost visibility, safety, home security, and curb appeal—while modern LED options add long life and energy savings. Well-placed lights also make evening entrances more convenient and welcoming.
Join our Insider list and check out the different lighting options that we have to offer.