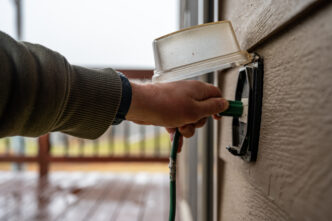
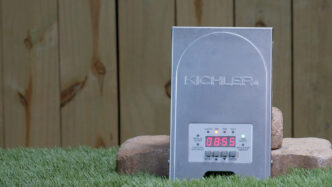
Outside electric sockets are a major part of powering your patio lights, garden tools, or holiday decorations. Installing an outdoor outlet can be extremely convenient on a regular basis and add to the overall functionality of your outdoor space, whether it’s plugging in a phone charger, lighting the setting or more.
And even though working with electricity might seem like a daunting task at first, this guide will walk you through the process, making it accessible even for DIY enthusiasts with basic electrical knowledge.
But before diving into this step-by-step guide, please note that this is not intended to serve as a comprehensive instructional manual for electrical work. For safety and accuracy, we recommend consulting a licensed electrician. Lighting Warehouse is not responsible for any damages or issues that may arise during the installation process. If you’re ever unsure at any step, talk to a professional electrician.
Why Install an Outdoor Outlet?
Before diving into the installation process, let’s briefly explore why having an outdoor outlet is beneficial:
- Convenience: No more running extension cords through windows or doors. An outdoor outlet provides a dedicated power source for lawn equipment, outdoor lighting, and entertainment systems.
- Safety: Properly installed outdoor outlets are safer than using indoor outlets for outdoor equipment, reducing the risk of electrical hazards.
- Aesthetics: Eliminate the clutter of extension cords and make your outdoor space look cleaner and more organized.
- Property Value: Adding outdoor electrical features can increase the value of your home, making it more appealing to potential buyers.
Tools and Materials for Installing Outside Electric Sockets
Before starting, gather the necessary tools and materials:
- Outdoor-rated electrical outlet (GFCI recommended)
- Weatherproof outlet cover
- Electrical box (for outdoor use)
- Conduit and fittings (if required by local code)
- Cable (type UF-B for underground or outdoor use)
- Drill with spade bit
- Voltage tester
- Wire strippers
- Screwdrivers
- Electrical tape
- Silicone caulk or outdoor-rated sealant
- Fish tape (if running wires through walls)
- Circuit breaker (if adding a new one to your electrical panel)
- Hammer and nails or screws for mounting
Step 1: Plan the Installation Location
Decide where you want to install the outdoor outlet. It’s usually best to place it near an existing indoor outlet to minimize the amount of wiring needed.
Make sure the location is convenient for your intended use but also adheres to local building codes, which often require outlets to be GFCI (ground fault circuit interrupter)-protected and installed at least 6 inches above the ground.
Step 2: Turn Off the Power
Once again, safety first! Go to your main electrical panel and turn off the power to the circuit you’ll be working on.
Use a voltage tester on the existing outlet to ensure the power is indeed off before proceeding. This step is crucial to avoid electrical shock.
Step 3: Cut the Hole for the Electrical Box
If you’re installing the outlet on an exterior wall, you’ll need to cut a hole for the electrical box.
Measure the box, mark the area on the wall, and cut the hole with a saw. If you’re installing the outlet in a masonry wall, you may need a hammer drill with a masonry bit.
Step 4: Run the Cable
You’ll need to run the cable from the power source (an existing outlet or your electrical panel) to the new outdoor outlet location.
If you’re working with an existing outlet, remove it and carefully pull it out of the box, ensuring you don’t disconnect any wires. Drill a hole through the wall near the outlet to pass the cable outside.
- Running Cable Through Walls: If you’re running the cable through walls, use fish tape to guide the wire through the wall cavity. If necessary, you might need to drill additional holes in studs or joists to accommodate the cable.
- Using Conduit: If your local codes require it, or if you prefer added protection, run the cable through a conduit from the interior outlet to the exterior box. Attach the conduit to the wall with the right sized conduit fittings.
Step 5: Install the Electrical Box
Mount the outdoor electrical box in the hole you cut earlier. Make sure it’s securely attached to the wall. The box should be rated for outdoor use and weatherproof to protect against moisture.
Step 6: Wire the Outdoor Outlet
Now, it’s time to wire the outlet. Strip about 6 inches of the outer insulation from the cable, then strip about ¾ inch of insulation from each wire (black, white, and ground).
- Connect the Wires: Attach the black (hot) wire to the brass terminal, the white (neutral) wire to the silver terminal, and the ground (green or copper) wire to the green grounding screw on the outlet. If you’re installing a GFCI outlet, follow the specific wiring instructions provided with the outlet.
- Secure the Wires: Once the wires are connected, gently push them into the box, ensuring they’re not pinched or twisted. Screw the outlet into the box.
Step 7: Install the Weatherproof Cover
With the outlet secured, install the weatherproof cover. These covers are essential for protecting the outlet from rain, snow, and other elements.
Make sure the cover is tight and the gasket is properly seated to prevent water from entering.
Step 8: Seal Around the Box
To prevent moisture from seeping into your home, apply a bead of silicone caulk or outdoor-rated sealant around the perimeter of the electrical box where it meets the wall.
This step is crucial for maintaining the integrity of your home’s exterior.
Step 9: Restore Power and Test
Go back to your electrical panel and restore power to the circuit. Use a voltage tester to check that the outlet is receiving power correctly.
Test the outlet by plugging in a device to ensure everything is working as expected. If you installed a GFCI outlet, test it by pressing the “Test” and “Reset” buttons.
Step 10: Final Checks and Maintenance Tips
After testing the outlet, double-check that everything is secure and functioning correctly. Ensure that the weatherproof cover operates smoothly and closes properly when not in use.
Regularly inspect the outlet and cover for signs of wear, especially after harsh weather, and replace any damaged components immediately.
Installing an Outside Electric Socket—The Right Way
Installing an outside electric socket can take your home and garden to the next level, offering convenience, safety, and added value to your home. By following these steps, you can confidently install an outdoor outlet yourself.
However, if at any point you feel uncertain or uncomfortable, don’t hesitate to consult a licensed electrician. Proper installation and regular maintenance will ensure your outdoor outlet serves you well for years to come.
Remember, this guide provides a general overview and is not a substitute for professional electrical advice. Always seek the help of a licensed electrician for your outdoor socket installation. Lighting Warehouse is not liable for any mishaps or errors that may occur during your project.
Want to electrify your inbox? Join our Insider list and check out the different landscape lighting options that we have to offer.


